STEP 1
GERMINATION
Step 1A: Germination
(7-10 Days)
Start the growing process – there are many different approaches, but I feel the below approach works well as the below images are taken from a grow using our kit. When setting up your grow to make sure you use the best possible quality of seed. Always purchase from a reputable source and keep the strain of seed simple for your first grow.
Step 1A: Image


Step 1B:
Rappid-rooter plug: Make sure your plug is slightly wet: In the middle of the plug you will drop your seed into the central hole of the pug – drop down to the middle of the plug (lightly cover with a little of the plug material to keep the seedling covered).


Step 1C:
Put Rappid rooter plug (with the germinated seed in it) into the plastic grow dome supplied and leave in a warn light areas and keep it moist (window-sill is a good option if it stays warm during the day).


STEP 2
SEEDLING
Step 2A: Seeding
(Approx. 3 weeks)
After 7-10 days you will see a stem emerge from the grow-plug (say hi to your plant) … Keep moist and keep in the grow dome until the stem/leaves touch the roof of the grow-dome. Over the next 7-days the seeding will keep growing, its leaves and the stem will sprout out into a small plant that will start rapidly growing. Move the plant to the grow tent/light once you see the leave appear from you seed (as in the below image).
Step 2A: Image


Step 2B:
During the 2nd week you will see the second generation of leaves start to sprout.


Step 2C:
During the 3rd week you will see some roots starting work there way out of the bottom of the grow-plug and the leaves/shoots start to sprout and glowing fuller/larger set of leaves.

Step 2D: Planting: (1-day Approximate)
When you can see the roots growing through the bottom of the plug it’s time to put your plant into the soil. Once you place your plant in the supplied soils you will see a considerable growth period unfold.


Step 2E:
5-Gallion Cloth Pot: Unfold the cloth pot and stand it up.

Step 2F:
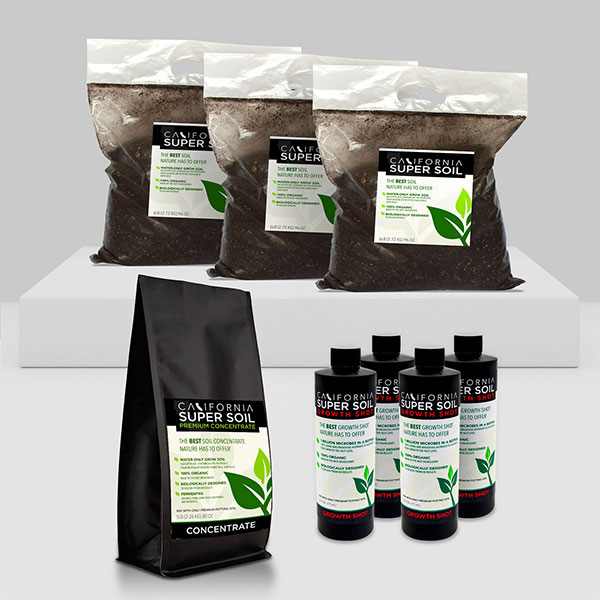
Pour into the bottom of your 5-gallon cloth pot the Cali Hot Soil (all 5-lbs) from the supplied bag.

Step 2G:
Next, pour the Fox Farm soil on-top of the Cali Hot Soil to the top of the pot (IMPORTANT – do not mix the soils).


Step 2H:
Next remove the seedling and pug out of the grow dome (do not try and remove the seedling from the pug). In the middle of the pot make a small hole in the soil with your fingers and put the plug/seedling into the soil. The pug should be buried into the soil about 85% of its high… but you should still be able to see the top of the pug slight protruding above the level of the soil).

Step 2I:
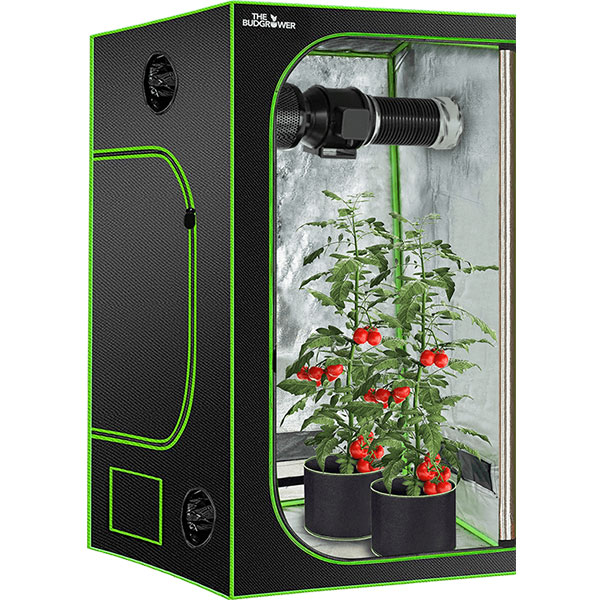
Water well (About 1.5 liter of water. Place your pot with your planted seedling into the grow tent and turn the light on – set the light-timer to be on for 21 hours-per-day (and off for 3 hours per day).


STEP 3
VEGETATIVE STAGE
Step 3A: (4-10 weeks)
Watering:
Be careful not to over water (the biggest killer of your plan will be to overwater). If you’re unsure if your plan needs water feel the weight of the soil pot. If it feels overly lite, add water, if not, don’t!!! – If you’re unsure… or wait until your plant withers and then water (your plant will recover within a couple of hours).
• Plan on adding about .7 liter of water every 3-4 days
• Heat: Plan on keeping your grow tent at around 70-90 degree for the optimal growing environment (sweet spot will be around 80 degrees)
Step 3A: Image


Step 3B: Day 1
For the first 48-hours keep the plastic dome covering the seedling plant to protect it from increased light source.


Step 3C: Day 7


Step 3D: Day 14


Step 3E: Day 21


Step 3F: Day 28


Step 3G: Day 36


STEP4
FLOWERING STAGE
Step 4A: Day 43 (10-17 weeks)
You will need to reduce the hours of light you give your plant.
• If your growing Auto flowering / Feminized seed: Reduce the light to 18-hours on and 4 off.
• If you’re using traditional female seed – change to 12-hours on and 12-hours off.
During this stage you will likely not need to use your air filtration system much – the smell issues normally arrive in the flowering stage. Start using the air filtration system in units (the unit provided is powerful so you will likely only ever need either 1 to 3 within the tent supplied.
Step 4A: Image


Step 4B: Day 50 (FLOWERING STATE UNDERWAY)
You will need to up the amount of water you give our plant during this stage (water every 3-4 days).


Step 4C: Day 57


Step 4D: Day 64


Step 4E: Day 71

Step 4F: Day 78
White hairs are starting to turn brown/amber color. When 75% of the white hairs turn amber in color its time to harvest your plant.


Step 4G: Day 85
Wait until your buds stop growing new, white hairs. By this point, your buds should be fragrant (the whole grow room or area will likely smell strongly as cannabis), plump and ‘filled out’. Wait until at least 40% of the white hairs have changed color (darkened) and are curling in. This marks the beginning of the harvest window. Buds harvested now will have more of a speedy effect and are not at full potency.
Harvest when 50-70% of the hairs have darkened for highest THC levels. Harvest when 80-90% of the hairs have darkened for more a couchlock, anti-anxiety effect (some of the THC has turned into the more relaxing CBN). The hardest part of growing cannabis for many new growers is waiting for the right time to harvest so feel free to reach and garner other perspectives (there is no definitive time it’s more about preference).


STEP 5
HARVESTING
Harvesting is easy.
Cut the whole plant just above the soil. The hardest part is done. You have grown the plant and there’s not much that can go wrong now. Avoid touching the sticky buds. Anything stuck to your fingers is goodness lost.
After you have cut off and trimmed all your glittery, beautiful fat buds, you will want to hang them upside down in a cool, dark place with plenty of ventilation so that they can dry out.
Use small scissors (nail scissors) to remove leaves from your buds.
Those big leaves can go into the bin. They have no active ingredients. If you don’t remove them they will make the Smoking less smooth (will make you a cough). The cleaner you trim your buds, the better they’ll look like. And the nicer they’ll be to smoke.
Dry slowly, but not too slow. For example, a good way to dry is spreading your buds on paper and leaving them in a dark room. They will dry slowly. But if they dry too slowly, they might catch mold which quickly ruins them.
Drying them slowly will make them develop a pleasant smell and taste. Slow drying will also make them milder to smoke.
Step 5B:
Take your plan out of the growing environment and using the gloves and sheers provided cut all the branches off you plant and hang them within your grow tent.


Step 5C:
Dry buds slowly for best results, and check often for mold or over drying. You’ve worked way too hard to lose your crop now. After your plants’ buds have dried (thin stems snap, but the thicker stems are still a bit bendy), it’s time to start curing them so they’re smooth, taste good, smell good, and have the best effects.


STEP 6
DRY CURE
To Cure the Buds
Put them in a tightly-closed quart-sized mason jar in a cool dark place. Fill each jar loosely about 3/4 of the way full. For the first 2 weeks of curing, open the jars once a day for several seconds to get fresh air in your jars and release any moisture. If your buds feel moist when you check on them, leave the tops of the jars off until the outsides of the buds feel dry to the touch. The moist buds are what causes mold!
Step 6B:
After your cannabis has been curing for at least 2 weeks, and they haven’t felt wet every time you’ve checked the jars for at least a week, you can start opening the lid once a week instead of once a day.
Some people only cure their bud for 1-2 weeks total while other cure their bud for 30 days or more. Because you need to open the jar regularly, you can always sample some as it’s curing to get a feel for whether it’s done or not.

Step 6C:
I personally think that plants tend to be more potent if you cure it for at least a month.
Curing for longer than 6 months doesn’t do anything, and plants can become less potent over time as THC turns to CBN. Keep your harvest in a cool, dry, airtight space for long-term storage.
Now you’ve officially complete and your product is ready to be consumed!


Disclaimer: *The purchase of all and any seeds should be done so in line with local States and Federal laws.

 Free FedEx Shipping