
If you want to grow weed with ease and complete control, an indoor marijuana growing setup is the best option. In recent times, beginner growers have started weed cultivation using an indoor setup because the indoor growing method has several advantages.
This method allows for growing the best weed under the grower’s full control and offers time flexibility. You do not have to wait for a specific period for this growing method. Depending on their nature, plants can be grown in any space or time of year.
If you live in a basement, balcony, small house, or apartment, don’t worry. Your plants can be grown anywhere at any time without needing extra space.
However, you must have complete knowledge of the indoor cultivation system for this purpose. This blog will explain the benefits of indoor growing and provide an easy guide on growing marijuana indoors.
Benefits of Indoor Marijuana Growing
Compared to outdoor growing, the indoor setup has more advantages. Although it can be expensive due to costly equipment, it is a far better choice than any other growing method.
As mentioned above, with full control of growth, you can manage nutrients, water, light, and other needs by your choice. Furthermore, all kinds of pests cannot affect the plant health. The following are the advantages of growing weed indoors:
Flexibility
Indoor growing is not dependent on sunlight at specific hours of the day. The availability and intensity of light can be adjusted according to the plant’s needs.
As plants need constant, high-intensity light, growing indoors can efficiently do the job. This method can also control extreme weather conditions and manage the amount of water plants require.
Best-Quality Weed
Indoor weed plants get the maximum amount of water and nutrients, while outdoor weed plants cannot reach their full potential. Although you have to spend money on the equipment, you can control the quality of weed plant yield.
Plants then acquire higher THC to increase their potency. That is why indoor weeds are far better than outdoor weeds.
Reduction of Pests and Diseases
Another benefit of indoor growing is that it lowers the number of dangerous pests. Pests are not controlled by pesticides, and indoor growing automatically prevents pests from damaging plants. Furthermore, by cleaning the growing area, weed plants are safer from other diseases.
Fast Harvesting
Indoor growing takes very little time from one harvest to another compared to outdoors. As you can control the conditions indoors, it helps harvest plants quickly.
Outdoor growing usually takes nine months, while indoor growing takes a minimum of three months for harvesting. This way, you can grow weed plants four times a year, whether in winter or summer.
Privacy and Security
A few states do not allow weed growing. However, if weed production is permitted in any area, it becomes difficult to cultivate in an open setup. An indoor setup helps a great deal in this regard.
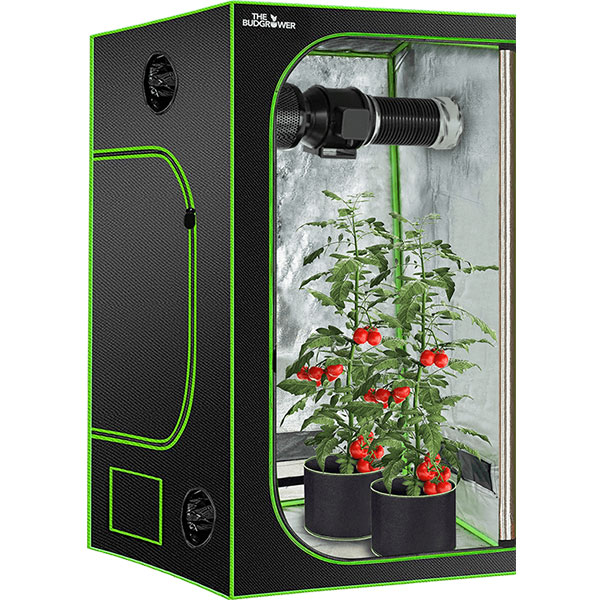
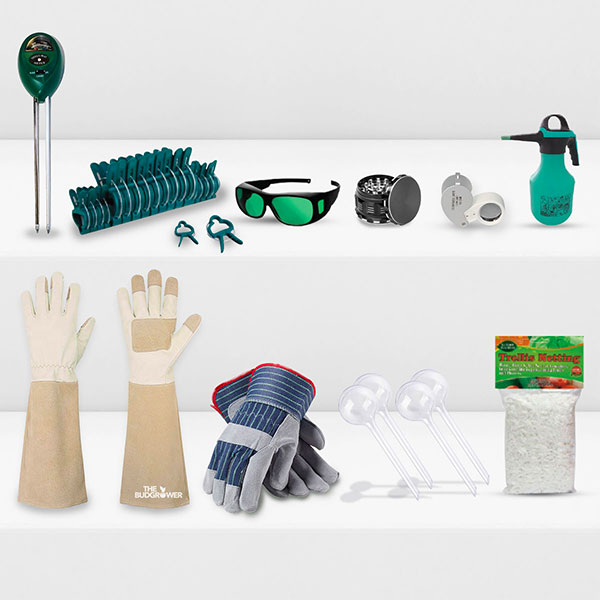
 Tools Needed To Grow Marijuana Indoors
Growing weed indoors needs cultivation equipment that helps plants influence the quality. Every growth medium, such as humidity, temperature, light, and air, can be managed easily with the help of the equipment. The following are those much-needed items:
- Plant Seeds
- Grow Tent or Grow Room
- Grow Lights with Optimum Watts (LED, HID, Fluorescent Lights)
- Time to Regulate Lighting or Fans
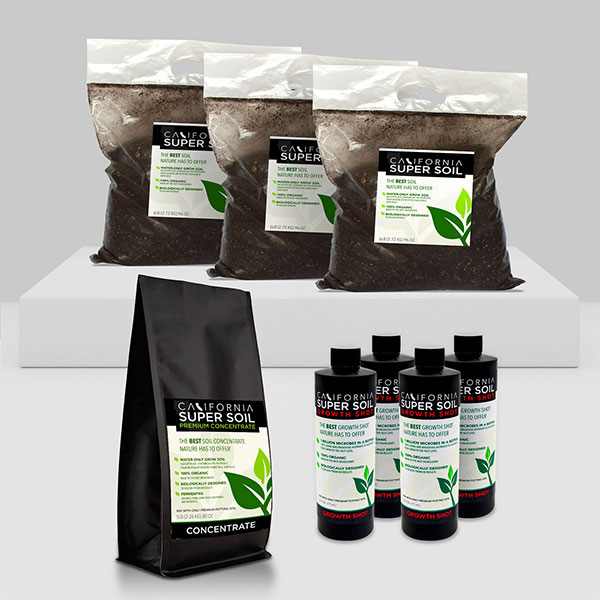
- Water
- Nutrients
- Planting Pots/Containers in a Variety of Sizes
- Carbon Filters to Reduce Weed Smell
- Ventilation for Better Air Flow
- Fans to Take Out Hot Air
- pH Meter
- Thermometer to Guage Temperature
- Hygrometer to Guage Humidity
- Growing Medium
Tips for Growing Marijuana Indoors
The following are the tips for indoor marijuana growing:
- Best Growing Seeds
- Plants Training
- Optimum Distance Between Plant and Light
- Adequate Amount of Water
 Steps to Grow Weed Indoors
While keeping in view the proper temperature, water, and lighting, here are the following steps to grow weeds indoors:
1. Selecting the Right Seed
Selecting a good seed for a weed plant is the first step of the cultivation process. Some specific seed strains are suitable for particular production. You have to take care of the following conditions while choosing the seed:
- Environment
- Yield
- Harvesting Time
While choosing a seed from a trustworthy source, you always look for If it is
- Hard
- Dark
- Dry
Many weed strains are available in the market, each containing a variety of good qualities. The following seed strains are considered the best to choose for indoor cultivation:
- Blue Dream
- Skunk #1
- Master Kush
- Afghan Kush
- Banana Kush
- OG Kush
- Blueberry
- Sour Diesel
- White Widow
- Northern Lights
- Girl Scout Cookies
Every grower has its own choice of seeds for greater potency. Here are a few types of seeds for indoor growing:
Feminized Seeds
Unlike non-feminized seeds, feminized seeds are here if growers want to remove male plants. These seeds are specifically made to produce female plants without any hassle.
Autoflowering Seeds
If you are a beginner in the growing industry, auto-flowering seeds are the best option. These seeds maximize the speed of growth from vegetation to the flowering phase.
Regular Seeds
Regular seeds are the most common yet more challenging seeds to grow. They are different from feminized and auto flowering seeds. These seeds are the best option for cutting clones from their plants.
2. Germinating the Seed
Here comes the growth phase of the marijuana plant. There are different methods of seed germination. Before the germination, you must keep the following supplies needed for it:
- Plastic Pipette
- Iso Alcohol
- Distilled Water
- Test Tubes
- Tube Holder
- Plastic Containers
- Coco Coir
- Yeast Caps
- Peroxide Solution
- pH meter
The first step of marijuana germination is to clean your growing surface with 91% alcohol for proper sterilization.
The second step starts with boiling water and then cooling it to room temperature. After soaking the seeds in cool water, this process cleans the dirt from them. You can add nutrients (magnesium, calcium, etc.) while keeping the pH around 6.0.
The third step is sterilizing supplies and equipment after the seeds soaking for 48 hours.
The fourth step is a bit long and takes time. You dip seeds in a peroxide solution (3%) for 15 seconds. If you exceed this time, the seeds can be damaged. Your next task is to dip seeds into a test tube filled with coco coir with the help of sterile tweezers.
You must place the seed in the middle of the tube and then add a nutrient solution. After this, you can seal the tubes with some space for air flow to help the weed seeds grow healthier.
The fifth step starts with wrapping the tube in aluminum foil to manage light intensity. After this, you can place the tubes in their holders.
The last step of germination is to maintain the temperature of plants at around 78 degrees Fahrenheit while checking the development of seeds.
Note that seeds can also be grown with soil, which is probably the best practice for inexperienced growers.
3. Vegetation
After seed germination, marijuana plants enter the vegetative stage at 70 to 85 Fahrenheit, with humidity between 40 and 70% and 8 to 24 hours of daylight. Proper airflow is essential for healthy growth in this stage.
The cleanliness of the growing surface is also necessary to kill pests and other diseases. Plants need an adequate amount of water and nutrients. You must remove the male plants in this stage.
If the water is salty, add some pennies to verify. If pennies fall before 2 minutes, then the water is pure. By taking care of all these measures, your plant will grow properly and not too tall.
4. Flowering
After the vegetation process, plants’ light cycle will change, and they will need 12 hours of darkness and 12 hours of light. At this stage, plants will start blooming. Every seed reaches its flowering stage at a different time, as cannabis takes 6-9 weeks, sativas 10-14 weeks, and hybrids 8-12 weeks.
Plants need pH-balanced water in the last weeks of the flowering. They start to produce smell and change the color of buds just like trichomes change to milky-amber while stigmas change to orange color with curly hair.
5. Harvestation
Now it’s high time to pay off! After observing the plants in the flowering stage, if they are ready, start harvesting. You will need the following equipment for harvesting:
- Trimmers
- Latex Gloves
- Plastic Tub
You can start harvesting by cutting your weed plants’ branches with scissors. You must take care of the buds here to avoid damage.
6. Drying
You can try two following types of trimming in this phase:
Dry Trimming
If you hang the trimmed branches for drying for a few days, it is known as dry trimming.
Wet Trimming
Trimming buds as early as possible and removing plant branches is known as wet trimming.
Note: The level of water in buds must be below 20%.
7. Curing
In the last step, place the dried buds in an airtight container for a few weeks or one month to preserve their flavor and manage moisture levels.
Note: Maintain the humidity level between 55-65%.
Conclusion
Indoor marijuana growing is the most reliable method for every grower. In the long term, it is a rewarding technique with maximum yield, but it can be expensive initially. This setup is all in your hands, and you have total control of production. I hope you find this blog helpful. Enjoy your growing journey!